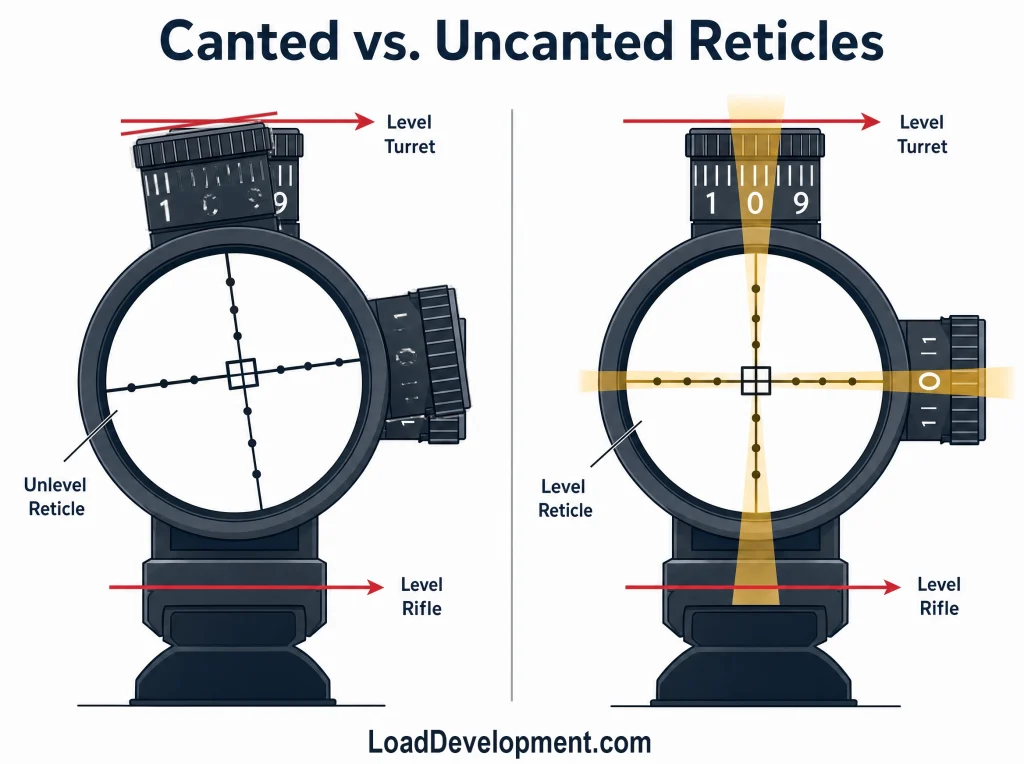
The Physics of Scope Cant (Why Leveling Matters)
A rifle bullet does not fall along the line of the rifle or the reticle, it falls straight down under gravity. If the scope is canted, the rifle’s elevation correction is applied on a tilted axis, so part of that correction turns into lateral error. That is why even a small amount of cant can create a miss that grows rapidly as distance increases.
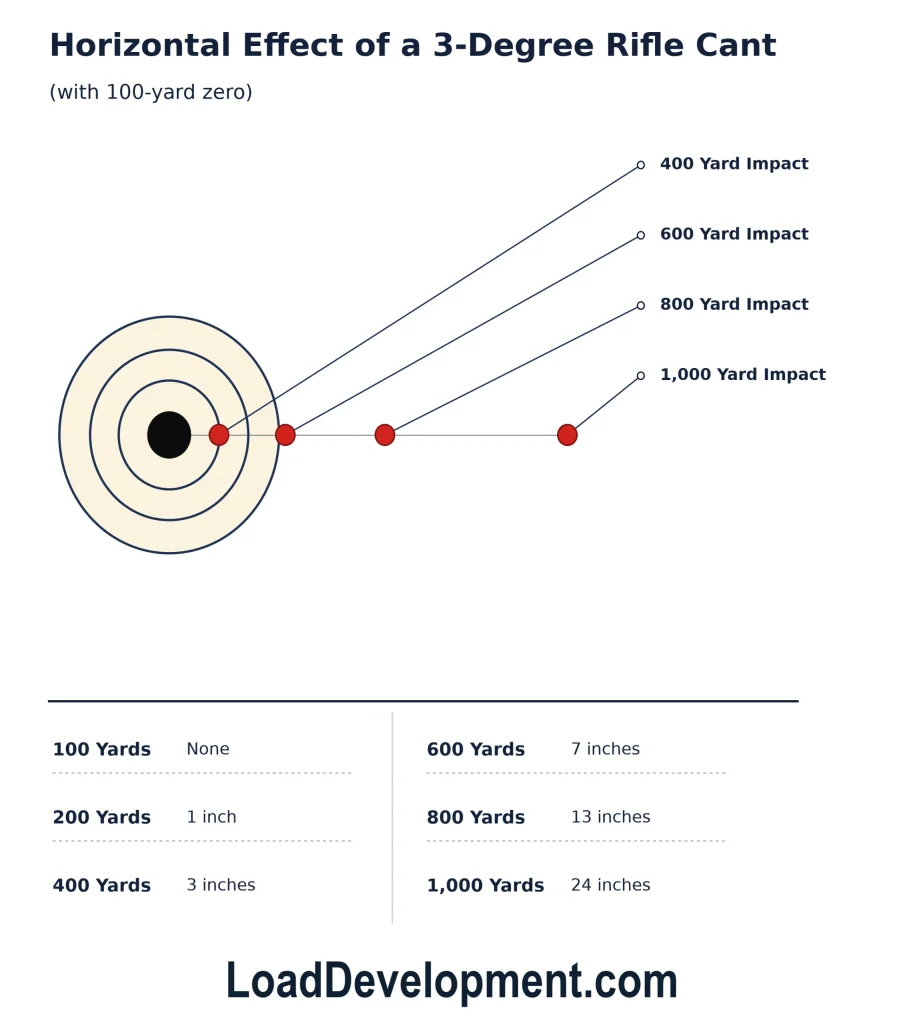
At 500 yards, just 1 degree of cant can move the point of impact several inches off vertical, depending on the load, muzzle velocity, and the amount of elevation dialed in. At 1,000 yards, 2 degrees of cant can turn into a miss measured in feet rather than inches because the bullet is now carrying a much larger elevation correction, and that correction is no longer acting purely in the vertical plane. The reticle still appears aligned to the target, yet the bullet is being launched on a rotated trajectory, so the reticle’s vertical stadia and gravity no longer agree.
The practical result is simple. A leveled scope keeps elevation corrections tracking up and down, while windage stays left and right. A canted scope causes those axes to blend, which makes long-range zeroes less repeatable and dope charts less trustworthy.
Preparation: Securing the Rifle
The rifle has to sit level before the scope is leveled. If the rifle itself is tilted, every later reference point becomes compromised, no matter how precise the scope setup appears.
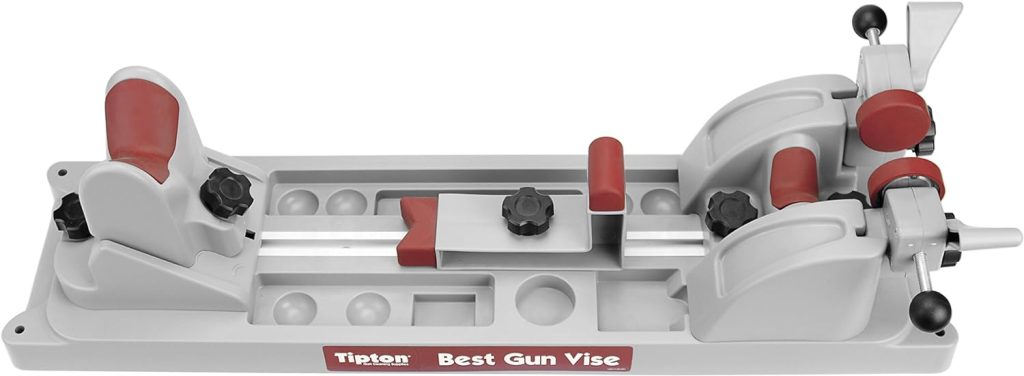
A rigid vise is the cleanest way to do this. A quality rifle vise, such as a Tipton-style fixture, holds the action steady while allowing small corrections until the receiver or rail is truly level. A soft cradle can work for rough fitting, yet it is easier for the rifle to roll in the rest while the rings are being tightened.
Before touching the scope, confirm three things:
- The rifle is immobilized.
- The receiver or rail is level in both axes.
- The optic is correctly seated for eye relief and ring alignment.
Small errors at this stage tend to multiply later. A scope can only be leveled accurately if the rifle under it has already been set as a stable reference plane.
Rifle vise or cradle for mounting scope
A rifle cradle or stand works to hold your rifle while your are leveling and installing your rifle scope, however it can turn in the cradle more easily, so we highly recommend the use of a rifle vise like this one from Tipton that we are using when we mount our rifle scopes.
The vise is designed to accommodate a wide range of firearms, including rifles, shotguns, and handguns. This makes it a versatile tool for any gun owner.
The vise allows for precise minor adjustments to get the rifle level, which is crucial for leveling the scope on the rifle too.
When you use the link above to shop for one of the products, we receive a small commission from the sale, at no extra cost to you. This helps us keep this site going, and does not affect the price you would pay usually in any way whatsoever.
Method 1: The Plumb Bob & Flashlight Method (Most Accurate)
This is the most precise setup when the goal is to align the reticle to true vertical instead of relying on the rifle’s external surfaces.
- Hang a plumb bob several yards in front of the rifle, far enough that the line is easy to see through the optic.
- Level the rifle in the vise or cradle using a spirit level on the rail or receiver.
- Install the scope in the rings with the screws just loose enough that the scope can still rotate.
- Aim the rifle at the plumb line and look through the optic.
- Rotate the scope until the vertical stadia of the reticle is perfectly aligned with the plumb line.
- If the reticle is hard to see, shine a flashlight or lamp through the objective end and project the reticle shadow onto a white wall.
- Match the projected vertical line to the plumb line, then tighten the ring screws evenly in a diagonal pattern.
- Torque the screws to the mount maker’s specification, usually in the 15 to 25 in-lb range for many scope rings.
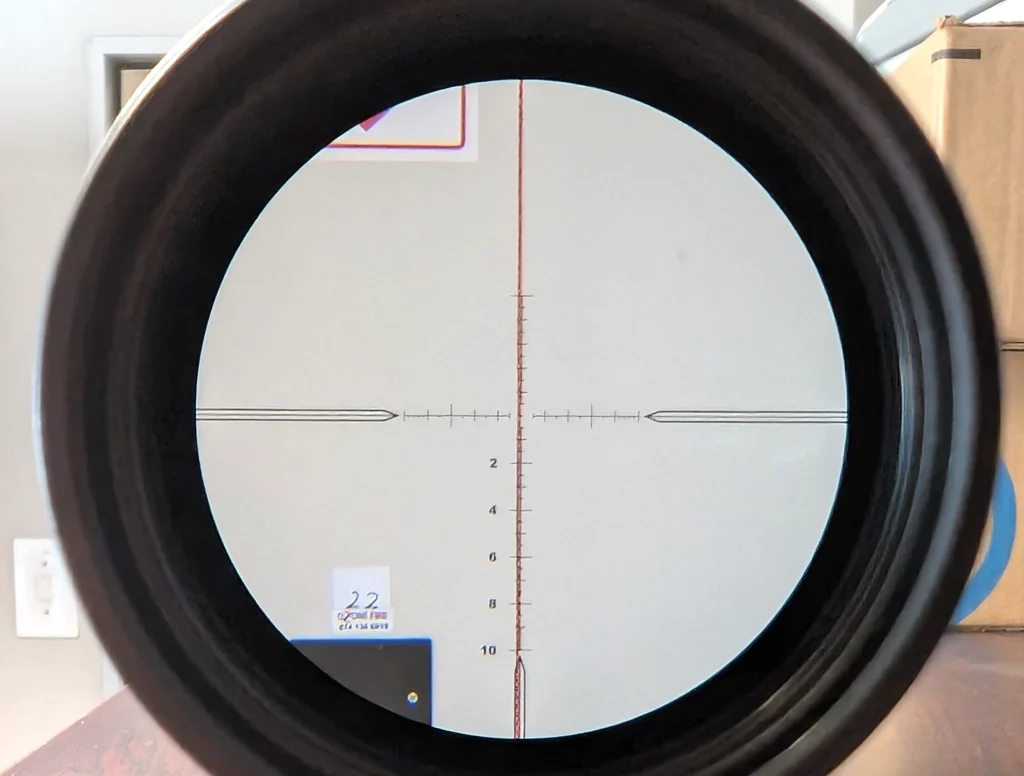
The strength of this method is that it references gravity directly. It does not depend on turret caps, which may not be perfectly machined to match the internal reticle. As a reticle is applied to the scopes by humans or the production line is set up by humans, a small margin of error may occur. Obviously less so (hopefully) with high-end scopes, but even manufacturers like Nightforce only guarantee an up 0.5% reticle offset or cant error, so it happens.
Method 2: The Bubble Level System (Fastest)
A dual-level setup is fast and practical, especially for repeated mounting jobs.
- Secure the rifle in a vise and level the action or rail with one bubble level.
- Place the second level on a flat reference point on the scope, usually the top of the elevation turret housing.
- Rotate the scope until both levels read true.
- Tighten the rings gradually in a cross pattern so the scope does not rotate out of alignment.
- Recheck both levels before final torque.
- Torque the ring screws to the manufacturer’s value.

This method is efficient, and it works well in the field or at the bench. The limitation is mechanical reference error. Turret caps are not always perfectly parallel to the internal reticle, so a level that rides on the turret body is fast, yet it is not always as exact as a plumb line or projected vertical reference.
Bubble Level for Scope Mounting
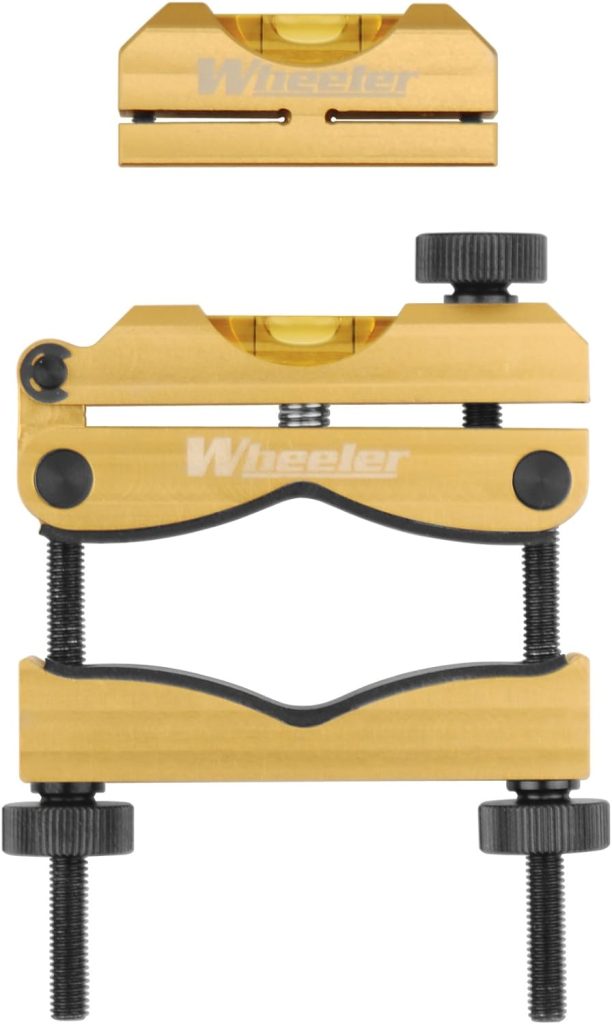
Featuring an adjustable barrel clamp with built-in level that fits around even the largest diameter barrels, as well as another precision machined aluminum level which you place on top of the elevation turret horizontal flat area on your scope, leveling your rifle scope has never been easier.
When you use the link above to shop for one of the products, we receive a small commission from the sale, at no extra cost to you. This helps us keep this site going, and does not affect the price you would pay usually in any way whatsoever.
Method 3: The Feeler Gauge Method (The Gunsmith Trick)
Some builders use feeler gauges to create a repeatable mechanical reference between the optic and the rail.
- Level the rifle in a vise.
- Place the scope in the lower ring halves.
- Insert feeler gauges between the flat bottom of the erector housing area and the Picatinny rail or ring saddle reference point.
- Adjust the scope until both sides show equal contact or equal clearance.
- Tighten the ring screws evenly, watching that the scope does not roll while clamping.
- Verify alignment with a plumb line or level before final torque.
This method works because it uses consistent flat surfaces to force the scope into a known orientation. It is a useful shop technique, especially when dealing with Picatinny-mounted optics and repeat installations. *NOTE: Not all the bottom surfaces on rifle scopes are exactly level with the horizontal reticle line, and that counts for almost all brands.
The Badger Ordnance Dead Level (For Picatinny Users)
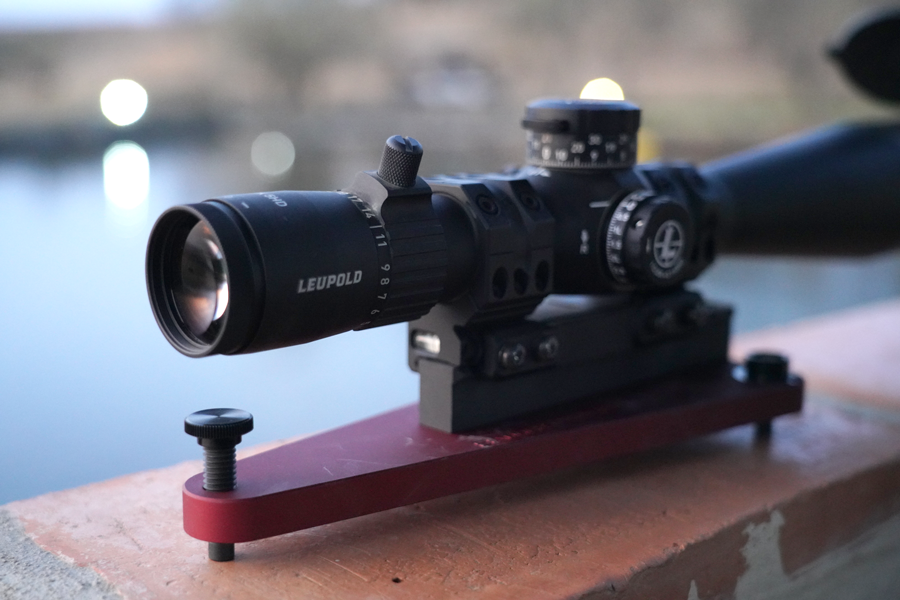
For Picatinny-mounted optics, the Badger Ordnance Dead Level is one of the most practical tools used in real mounting work. In use, it gives a very direct way to match the scope to the rail while the optic is still loose in the rings.
The reason it works so well is simple. On a properly made action and rail, the Picatinny interface is expected to sit square to the rifle’s bore axis. If the scope is leveled inside the mount before the mount is clamped to the rail, the optic can be transferred from one rifle to another with a high degree of repeatability.
In practice, that means the optic can be set once, left in the mount, and removed and reinstalled without starting from zero each time. For anyone who mounts multiple optics or moves the same optic between rifles, that saves time and reduces setup error. It is an advanced convenience tool, not a substitute for verification, so a plumb-line check is still worth doing when absolute precision matters.
Badger Ordnance Dead Level
If you use scope rings or mounts that mount on picatinny rails, you have many rifles or want to be dead-sure your scope is level inside the mounts, this Dead Level by Badger Ordnance is the thing to get. I have one, and since I have got it a few years back, I have mounted every single optic with it since. I use it with the plumb line method outlined above.
With quality rifle actions, the picatinny rail mounting surface is perfectly perpendicular to the vertical line of the bore, so if your scope is mounted perfectly level inside the picatinny scope mount or picatinny scope rings, then it will already be level when putting that mounting one a rifle, or moving from one rifle to another.
When I get a new optic, I will mount it inside the rings or mount with this Dead Level, then I always keep it inside those rings or that one-piece mount. Then I can simply loosen the mount from the picatinny rail on the rifle, when cleaning or moving it from one rifle to another, and I know it will always be level on every rifle I quickly fit it to.
When you use the link above to shop for one of the products, we receive a small commission from the sale, at no extra cost to you. This helps us keep this site going, and does not affect the price you would pay usually in any way whatsoever.
Scope Rings Scratching Scope Tube
If you are worried about the scope ring possibly scratching the scope tube coating during mounting or use after, you can apply a thin layer of petroleum jelly to the scope tube before leveling and mounting the scope. You simply then wipe off the excess around your scope rings after the scope rings have been torqued down to spec, and then your scope tube is protected until you take it off.
Real Avid Scope Leveling Kit & Precision Scope Level System
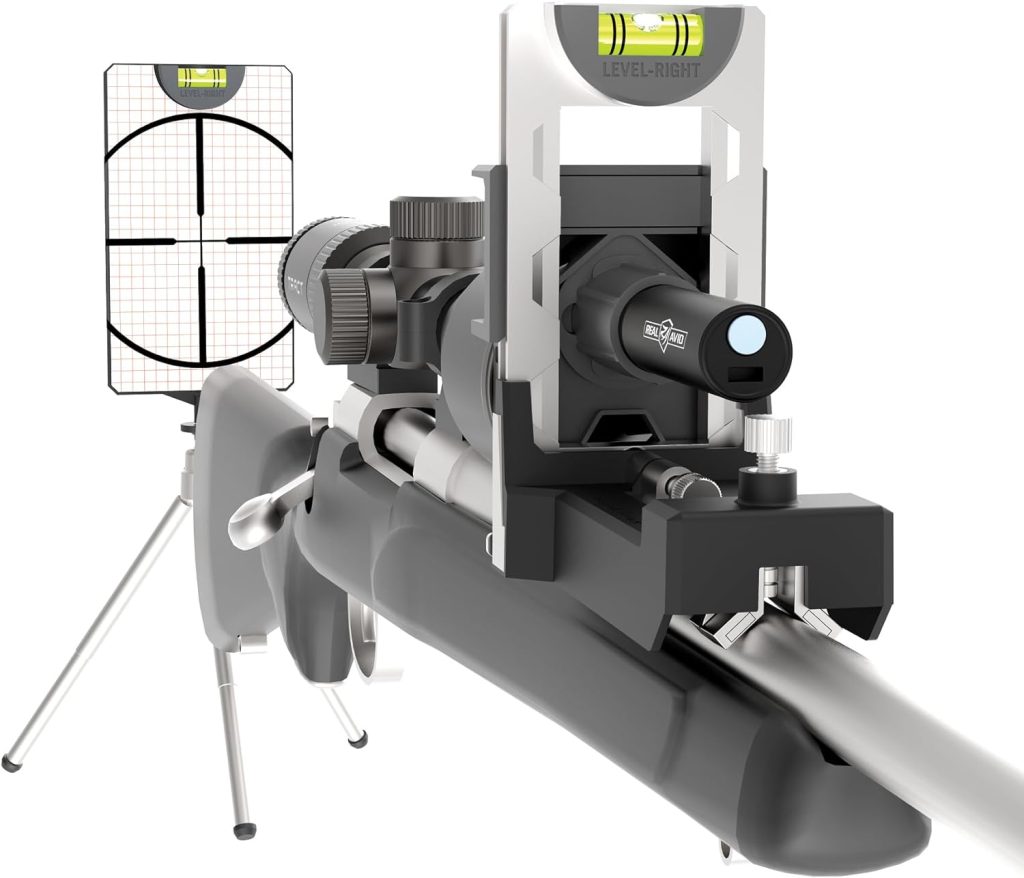
This scope leveling kit from real avid also makes it very easy as the target that you put on the stand in front of the scope, has it’s own bubble level to ensure that it is level before aligning the scope reticle to it.
When you use the link above to shop for one of the products, we receive a small commission from the sale, at no extra cost to you. This helps us keep this site going, and does not affect the price you would pay usually in any way whatsoever.
Frequently Asked Questions
A riflescope is mounted by setting eye relief, securing the rings, leveling the rifle and optic, and then torquing the screws evenly to spec. Each step matters because a small alignment error can affect both comfort and long-range precision.
Yes. A well-machined Picatinny rail gives a consistent reference surface, so the lower ring often sits square to the rifle when installed correctly. That makes final scope leveling faster and more repeatable.
Level mounting keeps elevation corrections moving vertically and windage corrections moving horizontally. It also helps ensure the vertical stadia of the reticle matches the path of gravity, which is essential at longer distances.
Not always. Many turret caps are close, yet the external cap surface may not perfectly match the internal reticle. For that reason, a plumb line or projected vertical reference is more exact when precision matters.
The correct torque depends on the ring manufacturer, but many scope rings fall in the 15 to 25 in-lb range. The safest approach is to follow the published torque spec for the exact rings being used.

AJ Deysel is a competitive rifle shooter in the PRS and NRL Hunter series, a lifelong hunter, and a recognized ballistics specialist whose load development expertise has been featured by industry leaders like Hornady. He is the founder and lead editor of LoadDevelopment.com. Read more about AJ or view our Editorial & Testing Guidelines.