If you ask a forum what you need to start reloading, you will get 50 different answers. Half of them will tell you to buy the cheapest starter kit available, and the other half will tell you to spend $3,000 on automated laboratory equipment.
Both are wrong.
If your goal is to build precision ammunition that shoots better than factory match ammo, you cannot use cheap, sloppy gear. However, you also don’t need a massive, automated progressive press. Precision comes from consistency, not volume.
Here is the no-nonsense, buy-once-cry-once guide to the exact reloading setup you need as a beginner to produce single-digit standard deviations and sub-MOA groups.
The Beginner’s Reloading Checklist & Estimated Budget
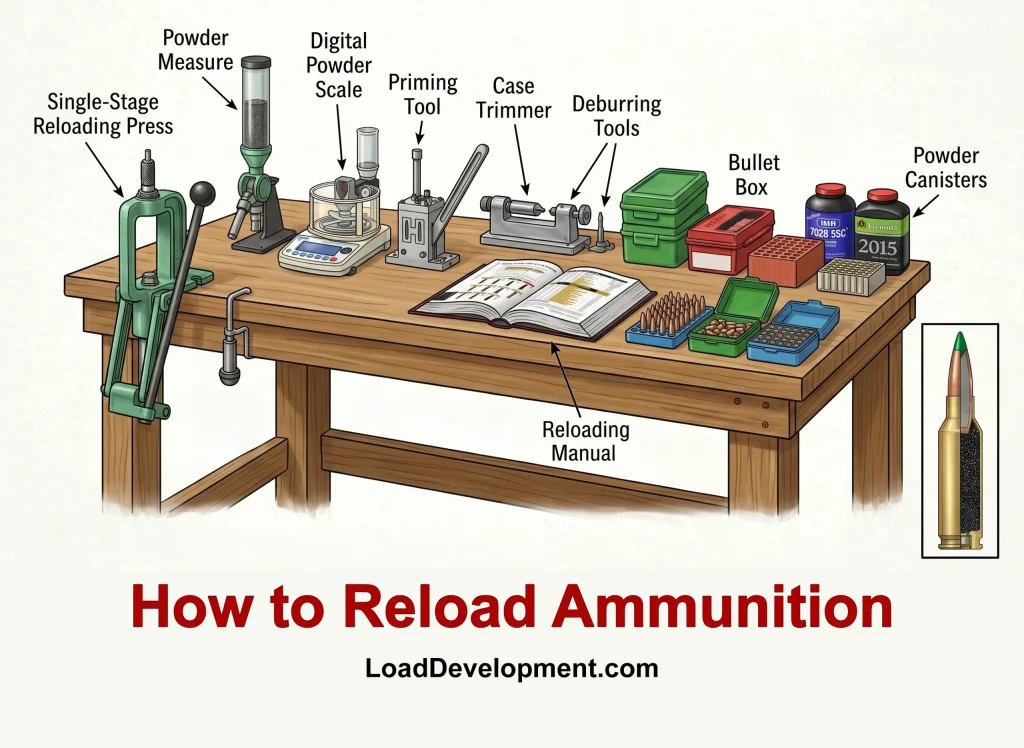
Before we break down the “why,” here is the exact list of what you need on your bench.
| Equipment Category | What It Does | Recommended Standard |
|---|---|---|
| 1. The Press | Resizes brass and seats bullets. | Heavy-Duty Single Stage (e.g., RCBS Rock Chucker) |
| 2. Dies & Shellholder | Caliber-specific tools that shape the brass. | Full-Length Match Die Set (e.g., Redding or Hornady) |
| 3. Powder Scale | Measures powder charges safely and accurately. | Electronic Dispenser or high-quality Beam Scale |
| 4. Priming Tool | Seats the primer into the brass safely. | Hand Priming Tool (e.g., Frankford Arsenal) |
| 5. Calipers | Measures overall length and brass dimensions. | Quality Digital Calipers (e.g., Mitutoyo or Hornady) |
| 6. Brass Prep Tools | Trims, chamfers, and cleans fired brass. | Manual Case Trimmer, Chamfer/Deburr Tool, Wet Tumbler |
Phase 1: The Reloading Press (The Heart of the Setup)
The press is the anchor of your reloading bench. There are three main types: Single Stage, Turret, and Progressive.
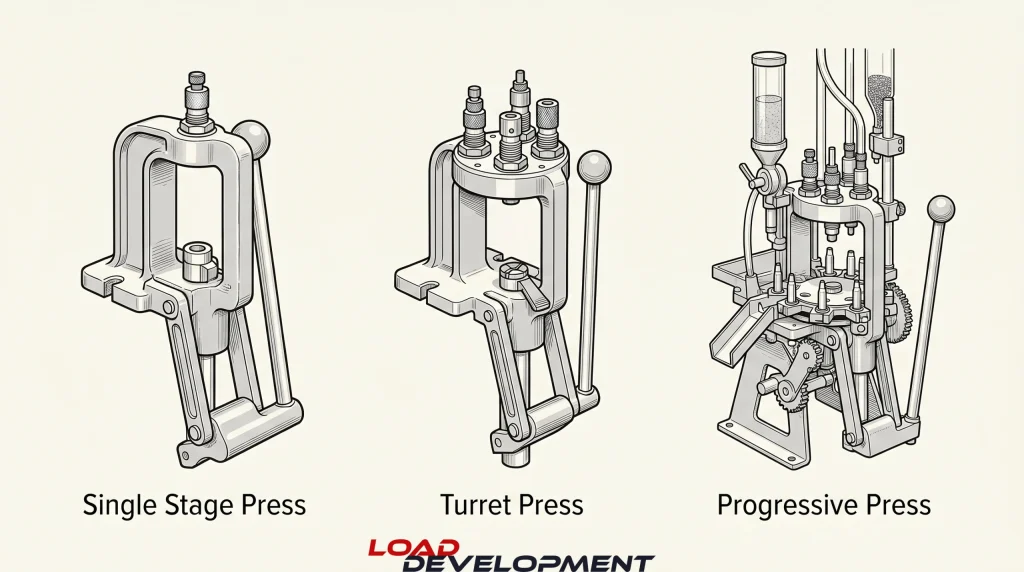
For a beginner focused on precision, you must buy a Single Stage press. Progressive presses (which pump out a finished round with every pull of the lever) are great for high-volume pistol shooters, but they introduce too much “slop” and variation for long-range rifle rounds.
You want a heavy, cast-iron “O-Frame” single-stage press. It does one operation at a time. It is slow, but it is perfectly rigid, ensuring your bullets are seated perfectly straight (concentricity).
- Top Recommendations: The RCBS Rock Chucker Supreme for the faithful, proven standard press or the Area 419 Zero press if you want the best of the best. These will literally outlast you and can be passed down to your grandchildren.
Phase 2: Dies and Shellholders
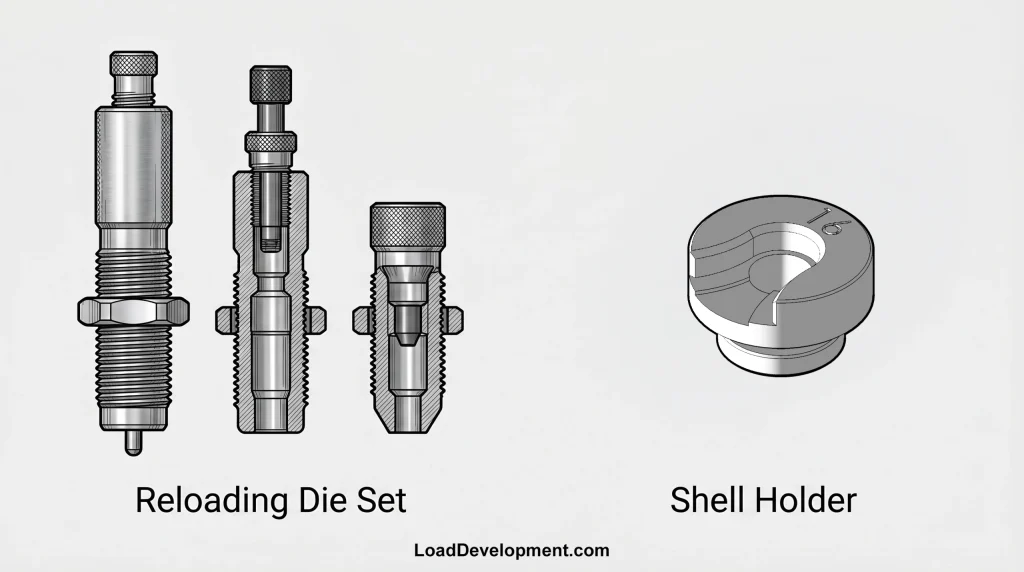
The press is just the muscle; the dies are the brains. Dies screw into the top of your press and are caliber-specific. If you want to load 6.5 Creedmoor, you need 6.5 Creedmoor dies.
You need a Full-Length Sizing Die (which squeezes fired, expanded brass back to factory specifications and pops out the spent primer) and a Seating Die (which pushes the new bullet into the case to the exact depth you want).
- The Shellholder: Don’t forget this. It slides into the bottom (the ram) of the press and holds the base of the brass case. They are cheap, but you cannot reload without one.
Phase 3: Powder Measurement (Safety & Consistency)
This is where precision is made or lost. If your powder charges vary by half a grain, your muzzle velocity will swing wildly, and you will miss your target at long range.

You have two choices here:
- The Analog Route (Beam Scale & Trickler): Very accurate, very slow. You drop a rough powder charge into a pan, put it on a mechanical balance beam scale, and twist a “trickler” to drop individual kernels of powder until it perfectly balances.
- The Digital Route (Electronic Auto-Dispenser): This is what most modern precision shooters use. You type “42.5 grains” into a keypad, and the machine automatically dispenses the exact amount of powder into a pan.
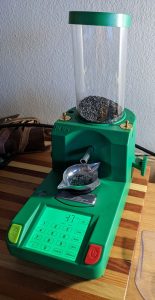
- Top Recommendation: The RCBS ChargeMaster or Hornady Auto Charge Pro. They are expensive, but they save hundreds of hours at the bench.
Phase 4: Brass Preparation Tools
When you fire a rifle, the brass casing expands like a balloon to seal the chamber. When it cools, it shrinks slightly, but it still stretches. Before you can reload it, you have to prep it.
- Cleaning: Fired brass is covered in carbon. The best modern method is “Wet Tumbling” using stainless steel pins, water, and a little dish soap. It makes the brass look brand new, inside and out.
- Case Lube: You MUST lubricate rifle brass before pushing it into a sizing die. If you don’t, it will get hopelessly stuck in the die. (A simple spray lube like Hornady One Shot works well).
- Trimming: Because brass stretches when fired, it eventually gets too long to safely chamber. You need a Case Trimmer to shave it back to spec, and a Chamfer/Deburr Tool to smooth the sharp edges you just cut.
- Calipers: You need a high-quality set of digital calipers to measure your brass length and your final loaded cartridge length. Do not buy cheap plastic calipers.
Phase 5: The Priming Tool
The primer is the small spark plug at the base of the cartridge. Many single-stage presses come with a priming attachment, but they are notoriously clunky and lack “feel.”
If a primer is seated too shallow, your rifle might not fire. If it is seated too deep, it can crush the internal anvil. You want a dedicated Hand Priming Tool. This looks like a pair of pliers that holds the brass and allows you to squeeze the new primer into the pocket by hand. It gives you the tactile feedback needed to know the primer is seated perfectly flush.
(Note: Confused about which primers to buy? Read our Ultimate Guide to Reloading Primers for a full breakdown).
What About “Reloading Kits”?
Should You Buy a Starter Kit? If you don’t want to buy every piece of equipment individually, manufacturers like RCBS, Hornady, and Lee sell “all-in-one” starter kits. These are excellent for beginners because they guarantee you aren’t missing any crucial components (like a shellholder or case lube) on day one.
However, not all kits are created equal. Some include high-end cast-iron presses but terrible powder scales, while others are entirely plastic. If you decide to go the kit route, read our comprehensive guide on the Best Reloading Starter Kits for Beginners to see which box offers the best value for precision shooting.
Next Steps: Time to Load
Once your bench is bolted down and your gear is set up, it’s time to start looking at load data and ballistics.
Before you buy your bullets, make sure you understand how they will perform in the air. Check out our guide on What is Ballistic Coefficient? to choose the right projectile, and bookmark our Trajek Calculator to run your drop charts once your ammo is loaded.
Chronograph
A chronograph is a device that measures the velocity of a bullet as it is shot past its sensors. There is a relationship between speed and pressure. Pressure measuring devices are very expensive and therefore out of reach of the general public. The most reliable way to ensure that we stay within safe limits is to measure bullet speed. The indicated speed in the RDM tables is therefore the determining factor, not necessarily the loads. Your weapon may use more or less gunpowder to achieve the same speed.
Some loaders consider a chronograph to be a luxury, intended for the more dedicated loaders. Nothing is further from the truth; A chronograph is absolutely essential for any reloader. I think EVERY reloader MUST test his loads with a chronograph and confirm that his self-loaded cartridges are safe to shoot in his weapon. If you can’t afford a chronograph, borrow one or buy one in a group. But, great please, use a chronograph. My motto is: “To measure is to know”.
Frequently Asked Questions

AJ Deysel is a competitive rifle shooter in the PRS and NRL Hunter series, a lifelong hunter, and a recognized ballistics specialist whose load development expertise has been featured by industry leaders like Hornady. He is the founder and lead editor of LoadDevelopment.com. Read more about AJ or view our Editorial & Testing Guidelines.